This is such a beautiful mini book that Leah over at Life with Lou has created http://lifeaslou.blogsome.com/2008/12/04/christmas-mini-album-the-cover-and-other-details-and-a-little-contest-give-a-way/trackback/ She tells you how she did it and she has a RAK too so go have a look!
Sorry I have nothing else new to post...we are still packed for a move but keep getting postponed...ugh! I am so thinking I need to tear open my boxes with scrap goodies so I can get back to scrappin and posting here.
Thanks for being patient with me! :)
Thursday, December 4, 2008
Saturday, November 22, 2008
Just wanted to pass this on to all of you!
As far as I go, still have not moved...some personal issues keeping me here, so still all my goodies are packed away!
I recently won a wonderful prize from a challenge at Scrapbooks N Stickers......a Bind it All and lots of goodies to go with it! Thanks Kim! Do check it out http://www.scrapbooksnstickers.typepad.com/

I recently won a wonderful prize from a challenge at Scrapbooks N Stickers......a Bind it All and lots of goodies to go with it! Thanks Kim! Do check it out http://www.scrapbooksnstickers.typepad.com/
Monday, October 6, 2008
I Will not be posting for a bit.....
I am in the process of packing to move so all my scrapping goodies are in boxes...waaahhhhh! I am not sure when the boxes will be unpacked but when they are you can be sure I will be back with more ideas! Until then, take care!
Wednesday, September 17, 2008
Sharing my idea binder with you!!
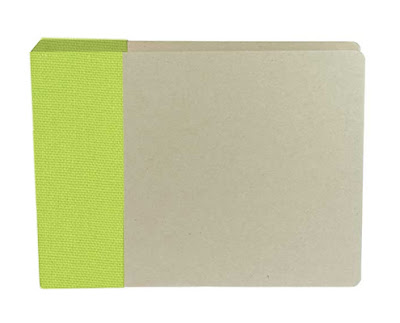
Hey everyone! Well I really needed to not only re-do my idea binder, but I also needed to weed it out and update it. Seems that over time likes and dislikes change and it is important to do this from time to time. So I used to use a regular note book and grew tired of it. I got several of these American Crafts Albums at Big Lots (really cheap! lol!) and decided I would use it for this.
 So y'all know I am in LOVE with Basic Grey's Color Me Silly line, and I have used it to alter most organizational items for my scrap space. So here is what it looks like now.......

Here is what it looked like before I started...
So y'all know I am in LOVE with Basic Grey's Color Me Silly line, and I have used it to alter most organizational items for my scrap space. So here is what it looks like now.......
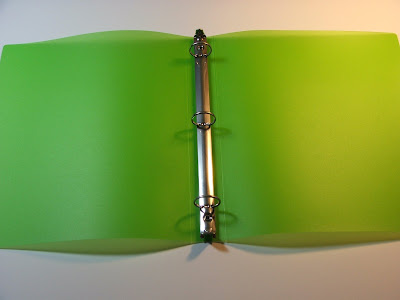
Here is what the inside is like and the dividers for each section (on the left are pictures that inspire me) I have the sections broken down as follows:
1. Printouts - this is for ideas that I find on the net and print out. Some times I just save things to the computer but I also like being able to access some of them while I am not on the puter (which is rare! lol!)
2. Templates - Some times I make my own templates like large flowers, or circles and to aviod making them again I save them in page protectors here. I usually make them from a light weight chipboard so that they will last.
3. Sketches - Some times I print out sketches for fast reference and keep them here. I also am in the process of altering a rol-o-dex to save sketches in also. I have a nicely bound sketch book that my friend Renee made for me as well. (guess I have them all over! lol!)
4, Poems and Quotes - In this section there are also page titles and other "words" that I may see on a layout while browsing a gallery, blog or really anywhere, that I might want to use on future projects.
5. Miscellaneous - All the odds and ends that I don't know what to do with like copies of on line orders, upcoming events, etc. Thanks for looking and I hope that I have inspired you to pay some attention to your own idea binder!


Thursday, September 11, 2008
I am a bad bad blogger! lol!
I am so bad that I almost forgot how to sign in to my blog! so sorry! Anyways just wanted to add a quick idea that I was playing around with and I think it is quite nice!
I was wanting some texture to some flowers for a book I am working on and the idea hit me to try the red velvet ribbon you see in the photo (it is plastic backed) in conjunction with my Big Shot and yay! It works! Even with sizzlits. Just use the ribbon as you would paper.....and great thing is that it is pretty inexpensive for lots of it! Now if I can just find more colors....lol! Enjoy!

I was wanting some texture to some flowers for a book I am working on and the idea hit me to try the red velvet ribbon you see in the photo (it is plastic backed) in conjunction with my Big Shot and yay! It works! Even with sizzlits. Just use the ribbon as you would paper.....and great thing is that it is pretty inexpensive for lots of it! Now if I can just find more colors....lol! Enjoy!
Tuesday, August 19, 2008
A Great Idea To Share!
So with it being the Back to School time of year, we are able to find all sorts of school supplies to alter and create with. You know the ever famous compostition notebooks, pencil cases sort of things. Well I have a new idea ! I was walking through my local office supply store (Staples) checking out all the back to school deals and came across these vinyl binders in tons of colors and just knew they could be used for more than a notebook....and best part they were only 25cents each!!!!
And just look at all the color choice there are! (I am on the lookout for more!)

So what I am suggesting you do is cut the covers off the notebooks and save all the parts. The covers are what I will be using to give you ideas. However, the metal binder rings can be used for other things as well. What you ask? Well you can nail them on a piece of wood and hang items from the loops like ribbon or packaged embellishments, or you can use them to make a chipboard album by attaching them to the chipboard with brads through the holes on each end.....(let me know what else you think of!!)

Now what can we do with the covers? Well here are just some ideas....and again please post and let us know if you think of any others!!!
We can use our die cut machines to cut out shapes and letters! For those who have a Cricut, when the new 2" blades come out, we should be able to cut this material! yippee! Oh and just think of these die cuts in the ever popular acrylic albums! (I bet they would look awesome!)

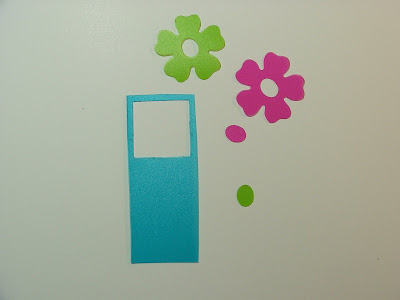
Don't throw away the part you are left with after you cut the die out. It can be used as a template. You can also ink or paint inside the cut out. Maybe use glue and glitter!

Then you can use scissors to cut just around the outside edge of the flower for a whole different die cut look!

You can use pieces as elements for "windows" in your cards or scrapbook pages!

And last idea I have for you is you can use it to make covers for mini albums. You can even make pages to mix in with pages of an acrylic album!
So run out and get the notebooks cheap while you can!!! Enjoy!

Friday, July 18, 2008
OH HAPPY DAY!!!!!!!!!!!!!!!!!!!!!!!!!
 I am so excited!!! I won Martha Stewarts Be Inspired Peoples Choice Award and will be getting a $500.00 gift card for this project I submitted!!! Thanks for sharing my excitement with me!

Tuesday, July 8, 2008
MATTHEW IS A DADDY!!!!!!!!!!!!!!!!!!!!!!!!!!!

congratulations!!!!!!
Yesterday Camilla
gave birth to a
7lb 4oz BOY named Levi!!!!
I am so happy and cannot wait to see photos!!!
Monday, June 16, 2008
MADE THIS FOR MY DAUGHTER FOR MOM'S DAY!

Well I just had my first grandchild (a boy!) in December so this was my daughters first Mother's Day. I wanted to make her something a little special and came up with this mini book. I used name badge protectors as page protectors for the mini pages in the book! I love how it turned out! Because of personal matters and distance she has not gotten it yet, she will be here this week and I will give it to her then!
Thursday, June 12, 2008
MY TOOLS OF THE TRADE

 Hi! This is where I keep all my scrapbook tools that I use often while I am scrapping. It was a bare wood box that I purchased at IKEA. I painted it green and used a Making Memory foam stamp with lime green paint to make the swirls (they match a design on my favorite Basic Grey paper "COLOR ME SILLY"). I adhered the paper to the front of the drawers and embellished with flowers cut from Color me Silly and card stock, Prima flowers and die cuts. If you noticed, I put the drawer that belonged in the opening at the bottom on top of the unit to make additional storage (just be sure to decorate the sides of the drawer to make it more eye appealing). Hope this inspires you to alter something for your scrap space!
Monday, June 2, 2008
I LOVE TIPS AND LISTS!

As you will notice as you revisit my blog! I have some of my own lists but many come from searching the net. I will be sharing all of them with you! So let me start with this list called the ABC's of stamping by Sara Horton. I think with the wave of acrylic stamps that have hit the scrapping scene any and all tips are welcome! Be sure and copy and paste them to your computer! Enjoy!
*
The ABC's of Stamping
Alphabet stamps are a wonderful investment for scrapbookers. Produced in a vast array of sizes and styles, letter stamp sets are both versatile and cost effective. Widely available in scrapbook, craft and education-supply stores, there is an alphabet stamp set sure to meet the individual taste of each scrapbooker.
Uses for alphabet stamps are practically limitless. With a little imagination, stamps can be used over and over again, but look different each time. Try some ideas from this Alphabet Stamp Primer to add interest to layouts.
Uses for alphabet stamps are practically limitless. With a little imagination, stamps can be used over and over again, but look different each time. Try some ideas from this Alphabet Stamp Primer to add interest to layouts.
*
Altered Book technique: Mix and match letter styles on a single project to create a "ransom note" or altered look on scrapbook titles or borders.
Altered Book technique: Mix and match letter styles on a single project to create a "ransom note" or altered look on scrapbook titles or borders.
Bleach: Stamp letters onto cardstock using gel-based bleach instead of ink.
Color: Add a little color to layouts by stamping letters in a coordinating ink color. Or go really wild and stamp each letter in a different color ink. Rainbow stamp pads can be used to give layouts a whimsical look.
Dog tags with embossed words can be altered by heat embossing with a metallic UTEE. While the embossing powder is still hot, stamp with small letter stamps to create a new word.
Embossing powder can be used to give letters a shiny or glittery appearance. Try "sticky embossing powder" to create flocked or glittered letters.
Fill-ins: Stamp letters inside slide mounts, label holders, labels, frame stamps, tag stamps, circle tags or typewriter keys for an interesting title or embellishment.
Glass: Letters can be stamped on microscope slides, tiny mirrors, or sea glass with Brilliance ink for a beautifully transparent and shiny page element. Pigment ink can be used, but must be embossed.
Hardware store finds: Personalize paint chips, laminate chips, wallpaper samples, and other hardware store finds by stamping words of your choice directly on them.
Individualize pages by stamping monograms or names onto cardstock with Versamark ink or colored ink. What a fun way to create your own background paper!
Journaling can be highlighted by stamping some or all of the words with letter stamps. Try stamping the first letter in the journaling with a large stamp to give emphasis.
Kiss off! Give letters a texture or pattern with the "Kiss Off" technique. Ink a letter stamp, then press the inked letter onto a clean texture stamp to remove some of the ink in a pattern. Next press the letter stamp onto the paper. The letter should take on the pattern of the texture stamp.
Leather strips, tags and frames can be stamped in dark brown or black for a faux tooled-letter appearance.
Metal accents are perfect to pair with letter stamps. Be careful when heat-embossing metal - it becomes extremely hot. Hold the element with a set of pliers for safety.
Notions such as buttons, ribbon, and twill tape are fun to personalize with small letter stamps. Create your own journaling strips, quote strips, and word buttons!
Odor eaters can be cut to create your own letter stamps. Like a font or lettering template, but can't find a stamp set to match? Simply trace letters onto a clean Odor Eater and cut out to create a letter stamp.
Paint is inexpensive and widely available. Don't limit yourself to stamping with ink - try acrylic or watercolor paints to add colorful words to layouts.
Q-tips can be inked in a darker shade to add shadows to stamped letters. Walnut ink also makes nice shadow effects.
Resist techniques can be accomplished by stamping letters with a clear "resist" ink, then embossing with a clear embossing powder. Next, use an inked brayer or sponge to give color around the stamped image. Rub any ink off of the embossed letter so that the background color shows clearly.
Stickers, slide mounts and photos can all be individualized by stamping letters and words directly on top of them. Brilliance or Staz-On ink can be used on slick surfaces and plastics.
Transparent elements such as transparencies, page protectors, mica, and Page Pebbles are easily enhanced by stamping letters onto them with Staz-On ink.
UTEE (Ultra-Thick Embossing Enamel) gives letters a thick, glossy finish. Try cutting out embossed letters and adhering to page with foam dots or jump rings.
Vellum can be layered over stamped letters for a muted effect. Try stamping on top of vellum with Brilliance ink for an interesting journaling box.
Washers are a popular and versatile page element. Purchase inexpensive washers in a variety of sizes, then personalize with your own words and tiny letter stamps.
X-acto knives can be used to create your own stencil. Stamp a letter onto a rectangle of cardstock, then cut out the stamped element to create the stencil. Use as part of a title, as the first letter of the journaling, or as a shaker box.
Young scrappers enjoy stamping their names with letter stamps. Use the stamps to help children learn the letters of the alphabet or create an ABC book of their own.
Zone: Try stepping out of your comfort zone long enough to try something new with your alphabet stamps. You may be surprised at the results!
Thursday, May 29, 2008
FINALLY UP AND RUNNING!


Well here it is....my very first post...hope you enjoy it!
First let me say that you can pause the music if it gets on your nerves and secondly I am really new
to all this blog stuff so hang in with me...I will get it all
figured out! Ok so let's get started!
This is not my original idea. I saw it posted at
twopeasinabucket and just knew that I had to
make one. Unfortunately I did not get the name of
the person who made it (so if you see this let me know
and I will add your name). Anyways I went to
Michaels and bought 3 wooden plaques in different
sizes. In the smalllest one I cut a notch that would
fit my ATG using my jigsaw. then I just screwed all
the layers together using wood screws. The best
part was the altering! I spray painted the plaques
it was faster than acrylics then glued on patterned
paper and flowers! Hope you try this!
Subscribe to:
Posts (Atom)